Grootlapse: Building a time-lapse camera
In March 2021 I built a time-lapse camera as a birthday gift for my fiancée. She’s loves plants and the camera allows her to see her plants grow. Here's how I built that:
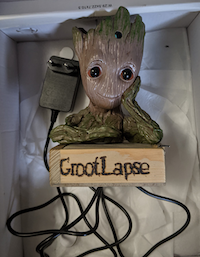
Let's start with the hardware: the heart of it is a Raspberry Pi and the Raspberry camera module. We had a Groot plastic pen holder lying around (no idea why), but since we're both Marvel fans, I thought it would make a good case. It also helped give the project a name, the time-lapse camera became Grootlapse. I used a wooden box to cover the Raspberry and burned the name of the project on the box.
The next step was to develop the software. There were two major challenges I faced: video streaming to preview the video and position the camera and video stitching to create a video with the camera's image
The Raspberry Pi comes with CLI tools to stream video called raspivid (the tool is deprecated, but since it still works, I never bothered to find out why). When you start the raspivid, the terminal is flooded with the textual representation of what the camera sees.
This data needs to be streamed to the client and rendered as video. I used ClojureScript to build this project. shadow-cljs helped me to build a node-server that runs on the Raspberry Pi and starts the stream. It sends the video data to the client. The client is a web app that receives the stream over a WebSocket connection and renders the video. I had a tight deadline for the project and needed to finish it before my wife's birthday within a month. A deadline always helps to stay focused.

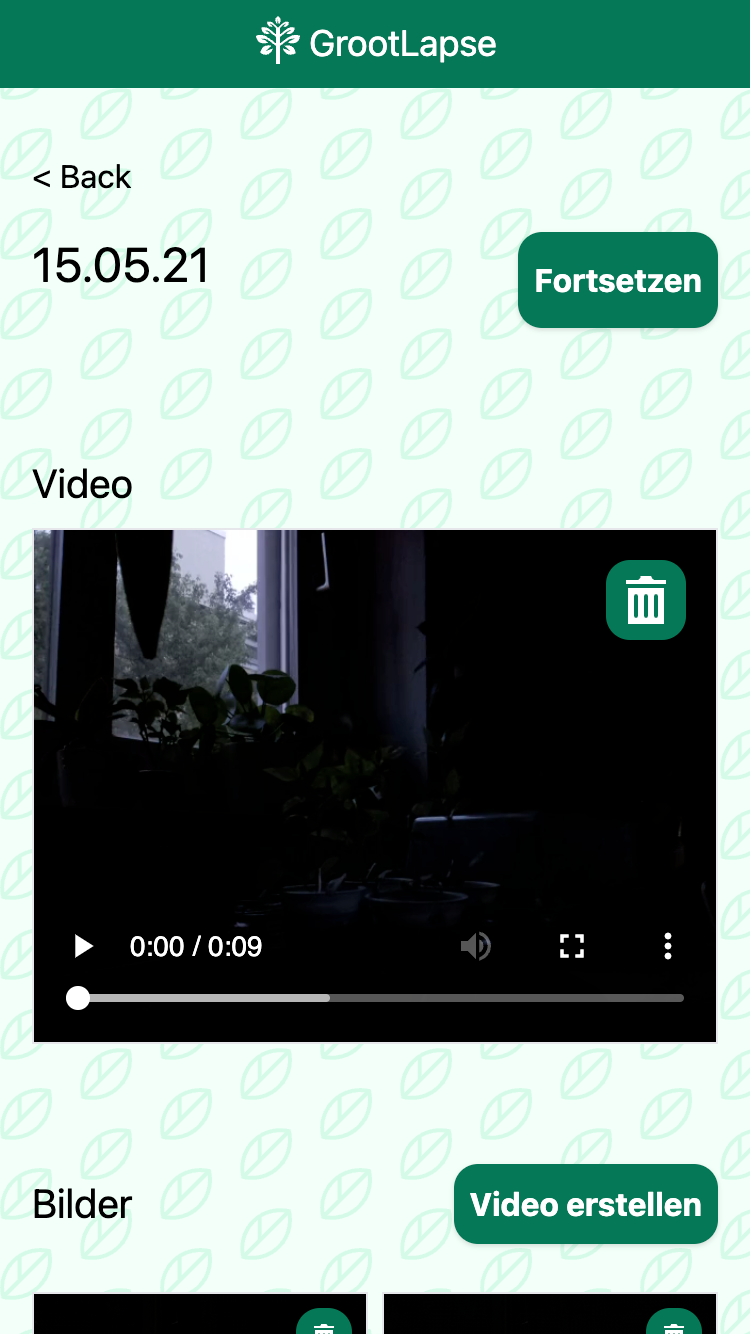
The next challenge was stitching videos together - the Swiss Army knife of video editing is FFmpeg. I used it to create time-lapse videos. FFmpeg has a vast API with countless options, but my deadline helped me focus on the ones I needed to create the videos.
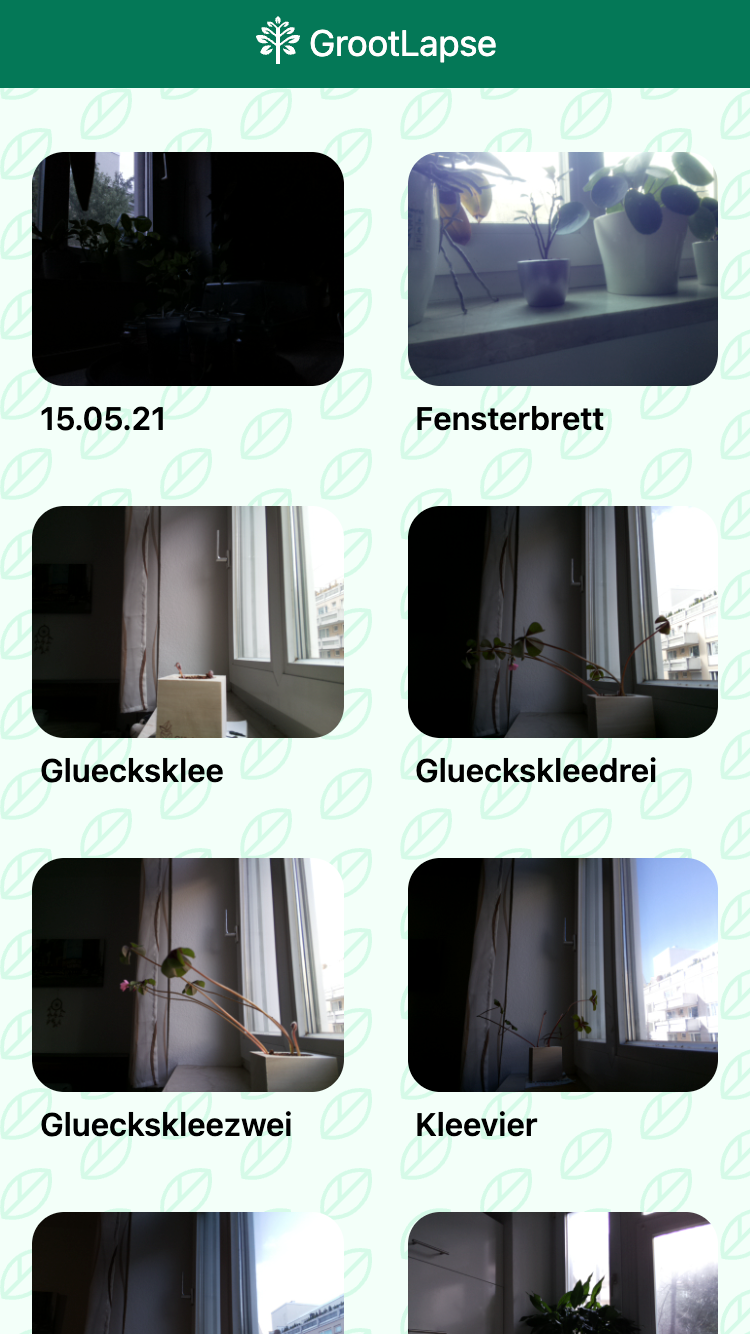
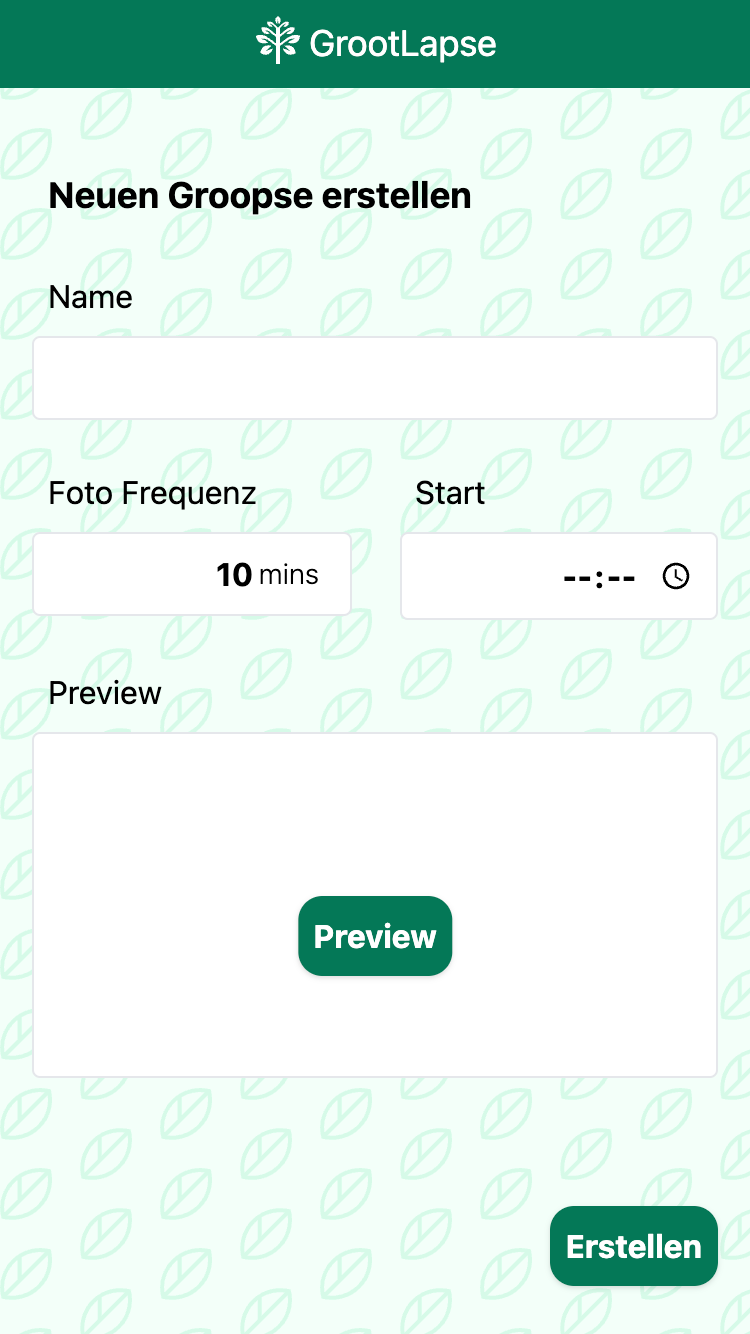
The next step was to create a user interface. The UI can create new time-lapse videos and manage the existing ones. Creating user interfaces is my main job, so this part went smoothly. It is possible to preview the perfect position for a new video using the video streaming implemented earlier.
To watch the plants grow while not at home, I used ngrok to make the Raspberry Pi available online. With this tool, you generate an URL for any server running on localhost that you can access on the web. Since I didn’t want to stream the images of the plants to just anyone, it is very helpful that ngrok allows you to add basic authorization access with just one command-line option.
I recorded all the time I spent on this project and it took me about 27 hours to build everything.
It was a fun project and since I surprised my wife with a hydroponic system for Christmas, it has been in active use ever since watching peppers grow.
The code is here and here is a video of GrootLapse's observations.